November 22, 2022

Curriculum Review: Core Knowledge History Units

On a recent chilly fall morning, my son and daughter and I had an "Olympic Games Day" out in our backyard. My son had brainstormed some games and equipment we could use to imitate the ancient, original Olympic games in Olympia he had read about in social studies: 

Javelin-- carved wooden spear
Discus-- bocce ball
Long jump-- see how far past a line they could each take a running leap
Races-- timed around the perimeter of our yard 
Wrestling-- because they really wanted to, although we added a few more rules beyond the two authentic ones we'd read about in Ancient Greece (which were simply: no biting and no sticking your fingers in your opponent's eyes!)

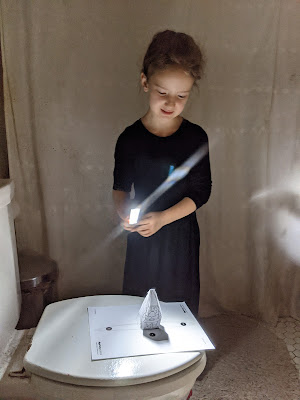
Olympic Games Day "Javelin"

We made some accommodations to each game to make it a little more fair for my 7-year-old going up against her 12-year-old brother. We even came up with a basic point system, doing a few trials of some of the activities and then tallying the points and announcing gold, silver, and bronze (for the activities I was willing to be a third participant in). Winners received gold-, silver-, or blue-wrapped chocolate coins we happened to have leftover in our candy stash. 

Needless to say, the kids loved it. But I don't get to take credit for the fun idea, as it was included as a suggested activity in my Core Knowledge Teacher Guide for the Ancient Greece and Rome unit my son is doing in history currently. 

We've been using Core Knowledge history units for several years now in our homeschool, and one of my favorite things about them is the enriching additional activities suggested along with every chapter or two, like our Olympic Games Day last week. There are a lot of things I like about this resource for teaching and learning history, though. Here's my review of the curricula. 

The Approach
The Core Knowledge Foundation, according to their web site, wants the emphasis of K-8 education to be "an enabling core of broadly shared knowledge...Such knowledge is possessed by successful adults and taken for granted by literate writers and speakers. It's the broad and diverse knowledge that makes responsible citizenship possible." It's a lofty statement, but the idea is that there are things we all need to know. The Core Knowledge Sequence, in fact, lays out ALL of those things they think kids should know from preschool through grade 8 in language arts, history, geography, mathematics, science, visual arts and music. It's an intense, and, honestly, overwhelming document. I wouldn't want to teach every subject using Core Knowledge resources because I think the kids would tire of everything being taught in the same basic structure all day; also, I have other programs and resources I love in other subject areas. But for history studies, it is our foundation and we've found it indispensable. 

Getting Started
When I am planning our year, I go to the Core Knowledge web site, click on Curriculum, and then Download Curriculum. You can filter by academic subject and/or grade level on the side. The page will show you all the units available that fit your search terms. I like to just select "History & Geography" and not specify a grade level so that I see all the social studies units. As the grade levels go up, the reading level of the student readers is higher, and some of the content is more complex, but a grade level or so up or down from where you child is doesn't matter at all. I select units based on what we want to study rather than on grade level, and more and more over the years I have my son (now a 7th grader) choose. I do NOT try to teach all of the units listed within a certain grade level. There is a breakneck pace mandated in the teacher guide if one were to do so to fit it all in; we like to take our time and work through the units deeply rather than trying to get through a certain number of them. 

Unit Components
The units consist of a Student Reader, a Teacher Guide, Timeline Cards, and Online Resources. A little more about each of these components is below. 


Student Reader: The Student Reader is a textbook for the unit. Some of the smaller units have just a few chapters, while the heftier ones can have around 20. Each chapter is just a few pages long and has a "Big Question" at the beginning to help students focus on the big ideas of the chapter. For a chapter called "The Golden Age of Athens" in our Ancient Greece and Rome unit, the big question was: "What were some of the cultural achievements during the Golden Age of Athens?" In the past, my son and I would discuss the Big Question after reading and discussing a chapter. This year, now that he's older, I've been having him write each Big Question and his paragraph response in a certain section of his social studies notebook. (It is a suggestion in the Teacher Guide to have students do so.) This way he has all the "answers" to the big concepts of the unit in one place to refer to or use for studying. My son is a detail guy so he tends to go off on a tangent with a lot of details about one particular part of a chapter he found interesting, so it has been challenging, but good for him, to learn that he has to first make sure he answers (and can sift out) the big ideas of the chapter. The Student Reader also has some photos, maps, and drawings that illustrate the chapter contents. Each chapter contains several key vocabulary words defined in sidebar boxes, to aid comprehension of the chapter and help boost students' vocabularies as a whole. The Student Reader is available as an actual book for purchase, or as a FREE downloaded PDF from the Core Knowledge web site. (See more about these options below under Cost.) 

Student Reader

Teacher Guide
The Teacher Guide is also available for purchase as a text or for free as a PDF download. The Teacher Guide includes the pacing guide, which I largely ignore. (We go at our own pace which is generally a bit than the 45 minutes a day, 5 days a week pace that is outlined.) It includes some general teaching suggestions and information about the unit components, and some worksheets that can be photocopied out of the back for student use (including crossword puzzles, fill-in-the-blanks, graphic organizers, and multiple-choice quizzes). There are also performance assessments at the end of each unit, suggesting larger and interdisciplinary projects to end each unit with a bang, whether by writing a story or essay, making a travel brochure, writing a poem, or making a piece of artwork. 

But the bulk of the Teacher Guide is chapter-by-chapter guidance. Every chapter, right through middle school-level units, includes pages of Guided Reading Supports for the chapter-- page-by-page commentary and questions to ask students to confirm their understanding (there are "Literal," "Evaluative," and "Inferential" questions). When my son was in 4th grade, we would read the chapters together, and I would refer to my Teacher Guide and ask all of these questions as we went. But my son is a good reader and this process made him a little antsy to just get on with it. So then we evolved to having him read an entire chapter (or two) and then I'd sit with him and go back and ask him a selection of these questions to check for understanding. Now that he's a 7th grader, we are skipping the guided reading supports; I am having him read a chapter, write his response to the Big Question on the chapter's big ideas, then I discuss with him his response to the Big Question with evidence from the text as needed. (A sample response to each Big Question is also included in the Teacher Guide.)  

Teacher Guide

Timeline Cards
Just as the Teacher Guide and Student Reader are, the Timeline Cards are available as a free download to be printed out, or for purchase in a cardstock bundle. Most chapters have at least one timeline card. Our current Ancient Greece and Rome unit has 24 Timeline Cards total, over 17 chapters. As you progress through the chapters, you hang up these Timeline Cards in order. Each card is 8.5 x 11 and shows an image and caption representative of the chapter, along with the date. The cumulative effect of hanging them all over the course of a unit helps students keep an eye on all they've read so far and internalize each event in history along with a sense of when it happened in relation to other events around that time or concept. The Teacher Guide suggests different ways of displaying the timeline, including vertically, horizontally, and pinned to a clothesline strung across the room. We have our current timeline making its way across the top of the wall around our great room and it works.   

Timeline Cards

Cost 
All these resources are available for FREE download at the Core Knowledge web site. For our first three years of utilizing Core Knowledge units, we did exactly that, my son reading the chapters on an iPad, me looking through the Teacher Guide notes on my laptop, printing out the Timeline Cards to hang on our walls-- and it worked. It's so great these resources are all free. However, this year for the first time we decided to spend the relatively small amounts to order the real life Teacher Guides, Student Readers, and even Timeline Cards. (This is largely because of a larger goal to help my son improve his study skills like reading for key ideas, underlining or highlighting as he goes, and notetaking. I thought those things might be easier to work on in concrete form, at least for now.) The books are attractive, the Student Reader the length and width of a paperback novel, the Teacher Guide spiral bound for easy use.   

Cross-Curricular Connections 
These units are a great foundation for any given event or period of time we've studied in history. They provide the backbone but they are not all we do. I think the most impactful unit we have done so far was the one on the American Revolution when my son was in 4th grade. We worked through the big Core Knowledge unit. But meanwhile, when he had reading time during the school day I had him choose from among some books in a couple of baskets of nonfiction on the topic of the American Revolution. (We discovered some real favorites in those days, and my son continues to tell anecdotes he learned via now-beloved nonfiction author, Steve Sheinkin, from his hilarious King George: What Was His Problem?) During writing time, he wrote a couple of informational pieces on subtopics of the American Revolution, synthesizing facts and stories from across multiple sources. History became a love of his that year, and the topics and themes of the American Revolution in particular, in part because we immersed ourselves in it.  

Online Resources
Each unit includes a link on the Core Knowledge web site for online resources, which anyone has access to, whether you purchased the books or just downloaded the free versions. The Teacher Guide at the end of each chapter will recommend activities that utilize one or several of these online resources. These "extra" activities can take a whole session or more, but they are generally well worth it. 

Here's a selection of fun and enriching things we've done by way of the online resources and Teacher Guide suggestions of these units over the years:
  • Played Native American games (Native Americans, Kindergarten)  
  • Watched the animated movie The Prince of Egypt, which tells the story of Moses and the Exodus (Three World Religions, Grade 1) 
  • Went on a virtual field trip to Versailles (French Revolution and Romanticism, Grade 6)
  • Created our own illuminated manuscripts (Medieval Europe, Grade 4)
  • Watched a video of Kabuki Theater, and wrote haiku (Feudal Japan, Grade 5)
  • Analyzed and compared two African American spirituals (Civil War, Grade 5)
  • Played a Maya math game (Maya, Aztec, and Inca Civilizzations, Grade 5)
  • Made a papier-mache pinata (The Culture of Mexico, Grade 1)
  • Met and fell in love with the musical Hamilton through a video of "My Shot" (The United States Constitution, Grade 4)
W's own illuminated manuscript next to some actual ones (Medieval Europe, Grade 4)

Pinata painting (Mexico Culture, Grade 1)

If used in one way, the Core Knowledge history units could be viewed as just another boring textbook. But I think it's best used as strong foundation for interdisciplinary study (doing some related reading, writing, art, etc.), and is greatly enriched by the engaging performance assessments at the end of each unit and by the online resources referenced in the units and linked online. 

I recommend these history units for homeschool or school use! Please let me know if you've tried them, or if you have any questions about implementing them. <3 

June 29, 2022

Positive, Productive Problem-Solving with Kids

It's easy as a parent to get in a habit of constantly reminding your child about the same behavior repeatedly. Maybe it's leaving their wet towel on the floor, maybe it's never being ready on time when it is time to leave the house, maybe it's always interrupting others, or maybe something else. We find ourselves reacting in the moment to the same, pretty predictable, problem(s) day in and day out. But this pattern doesn't solve the problem: you feel like a broken record, your kid feels nagged, and you both feel frustrated. 

But, when you step back and see the situation for what it is-- a regular problem area, a pattern-- that is a step toward ending the problem. There are ways to change and improve those habitual frustrations, and better yet, leave parent and child feeling good instead of bad. 

One strategy is the one-on-one parent-child conference, or social conference, best used when working with an individual child about a recurring problem. The other method is a family meeting, for problem-solving as a group a situation or part of the day that generally is not working well and involves more than one person. Both are useful, depending on the circumstances. 

Sometimes these methods blend together. The basic approach for both is similar. Both are conversations with kids. Both involve naming the problem, brainstorming solutions, and choosing strategies to improve. Instead of the adult making all the decisions and handing down consequences or changes to the way things are going to be done, both of these strategies have kids and adults working together to problem solve. Being involved in problem solving makes children feel respected and more on board with outcomes, and also gives them practice in an important life skill.

I first learned about these strategies years ago as a teacher when I read a great book called Teaching Children to Care, and from my Responsive Classroom training in general. There are lots of resources to be found about class meetings (which are applicable to families as well as classrooms) and problem-solving conferences, and I listed a few handy ones at the end of this post. I've internalized my own version of each of them over the years which I am sharing here.
 
Here's the format of each method and examples of when to use them.

~

One-on-One Adult-Child Problem-Solving Conversation

Examples of Times to Use It:
Your child is never ready to go out the door on time.
Your child always leaves their wet towel on the floor.
Your child habitually uses the bathroom for a long time during dinner time.
Your child leaves belongings strewn all over the house. 
Your child interrupts a lot.
Your child bites their nails.
Your child says hi barely audibly when they see people they know in public.
Your child regularly forgets their household chore(s)

Format of One-on-One Problem-Solving Conversation:
Link to a Google Doc outline of steps below here

1. Say what you (the adult) have noticed happening. As much as possible, describe the situation in a non-judgmental tone, just the facts. (For example, I've noticed a few times lately that when we see people we know and they say hi to you you answer so quietly that it's hard for them to hear or understand you.)

2. Ask if the child has noticed this, too. Usually, they have. 

3. Ask if the child has any ideas why this is happening. This is a time when shockingly simple solutions sometimes become apparent and the issue turns out to be an easy thing to fix. (For example, if the problem is that they never put their games away neatly, you may discover at this point that the reason is because they can't easily open and close the bags and boxes they go in-- in which case a very simple solution is to choose a new storage system together that is easier for them to use.) 

4. Tell the child why the behavior is a problem, who it affects, or the rule(s) it breaks. (For example: wet towels that get left around can stain things, they stink, and it causes us to have to do laundry more often.)  

5. Ask for any ideas they have to solve the problem. Kids often have ideas when you take the time to ask. If further probing is needed, ask what you can do to help with this problem. Ask what the child will do herself to help solve this problem. 

Try to just keep quiet and let them get any ideas they may have out first. The adult can then offer ideas or suggestions too. Make sure you don't present yours as more important. But include any ideas you have that might help. It should be a shared brainstorming session. 

It can be helpful to write down aspects of these conversations as you go, but especially to do so at this point, so you can both see and look over the ideas that have been mentioned. Every idea floated, unless absolutely unsafe or impossible, should be accepted and listed at this stage. Censor as little as possible and get as many ideas down as possible. 

6. Weigh the pros and cons of the ideas listed and agree on one (or a combination) to try. Look at all the possible solutions and discuss them or rule out as needed. Choose one to agree to try. Talk briefly about how you'll both know the plan is working and make a rough plan for when you'll check in about how it's going. 

7. Follow up: after a week, or a reasonable amount of time to have tried the solution, has passed ask the child how they think it is going. If it is going well and the problem is better, great! If it hasn't helped or hasn't helped enough, look back at the brainstormed ideas and choose something else to try also or instead. Repeat as needed with a problem-solving, we-can-figure-this-out-together mentality.  

~

Family Problem-Solving Meeting

Examples of Times to Use it:
When you're tired of ongoing problems such as:
House is messy
No one comes to dinner when called
Morning routine feels hectic
Fighting in the car
Rushing/fighting to get to a certain seat at the table or in the car
Playing too roughly in the house

Or proactively/preventatively when looking ahead at potential challenging situations:
How to make an upcoming week at grandma's go well?
How to make a friend who is coming over feel welcome?
What should we do when out to dinner at that fancy restaurant Friday night so everyone will have a good time?

Format of Family Problem-Solving Meetings
Problem-solving group meetings are essentially the same process as above, except it's not focused on one individual's problematic behavior, but rather on a recurring situation or time of day that is not going well in the family (or classroom) at large. It involves interactions among people; there are more moving arts. Everybody needs a chance to air their grievances as well as to share their ideas and solutions. As noted in the examples above, group meetings can also be super useful when we hold them proactively before a situation that is likely to be tough. (In my former first-grade classroom, I often held a class meeting a day or two before a substitute was to teach in my place, and I think it cut down-- at least a bit!-- on problematic substitute-teacher behavior and helped them all have a more productive day than they might otherwise have had.) 

Some basic rules for these meetings are important to establish and review each time: Don't interrupt each other. Use an "I" voice; say how things make you feel, not what you assume about others-- which is another way of saying don't place blame. 

In our home we recently had a meeting about our family dinner times, and particularly some recurring tension that cropped up at the end of them. See our situation and examples from our meeting below. 

Link to a Google Doc Outline of steps below here

1. State the problem(s). The adult says what they notice and why it's a problem.  
Everybody eats at different speeds. W eats fast and then is fidgety and wants to get up the moment he's swallowed his last bite. M eats more slowly and seems to get distracted by different things (including being distracted by the fidgetiness and things W does when he's bored and done eating) and we are all usually waiting for her to finish. Dad and I are trying to teach table manners and we sort of feel that we all should stay at the table till everyone's done. We feel nagged by W asking over and over if he can clear his plate. We  want M to have the time she needs but we also get a little bored when we are waiting for her to finish for a long time. Sometimes it even seems like M is going slowly at the end just to annoy W. We feel bad about the whole situation because dinner should be a pleasant time and it isn't at the end. 

2. Gather information from the group. Ask what everyone else notices and what's hard for them. 
M does not like when W tells her to hurry up-- it's annoying! If it's food she doesn't like as much, she eats slower. Sometimes she wants seconds but we sometimes say no if we've been already waiting. 
W feels bored out of his mind. He wants to get up so he can go read and do other things with his evening and not run out of time for those things because he has to sit at the table forever.  


3. Brainstorm solutions. Have the whole group brainstorm ideas of how to make the situation better. Make sure everyone gets their turn to talk and say everything they want to say. (Boy oh boy, did my kids have strong feelings and therefore a hard time waiting their turn to say their piece during our meeting). Accept and write down any ideas unless unsafe or impossible.  
If we have things M thinks are yummy for dinner she would eat quicker. 
Have a set time W can always get up by even if others aren't finished. 
Have a set total length of time for dinner and when that time is up dinner is over, done or not.
Give a 5 minute warning at the end of dinner. 

4. Choose a solution to try.  Talk together about which ideas seem the best or most likely to work and agree on one, or a combination of a couple, to try. Make sure everyone can agree to try it. Make sure it's realistic/feasible. Make sure it respects everyone involved.
We decided to try a combination of things, including giving a warning when dinner is over and Mom getting at least one dinner idea from M each week for something she thinks is yummy and wants to eat. But the main thing we chose is a length of time for dinner. We wanted it to be a generous amount if time to be realistic for M and not cause her to feel pressured to eat fast, but also something a bit more efficient for her to learn to work with that felt workable for the rest of us. We chose 40 minutes with a plan to set our time timer (by the way: these are incredibly handy tools) for that length of time so everyone could be aware of how much time is left.   

5. Make a plan for how you know whether the strategy is working or not and when you will check in again. 
We decided to see how it was going in a week. 

6. Check back in and adjust the plan as needed. When you check in some days later, decide if everyone thinks the problem area is getting better. If so, great! Keep going. If not, go back to the drawing board and choose another or an alternate solution to try. Repeat as needed.  
The general consensus was that everyone was liking the new plan. There was little or no pestering from W, which M and the parents both appreciated. W was usually getting the time he wanted in the evening after dinner. M usually had enough time to finish what she wanted and when she didn't it was only a couple bites she had to toss or save as leftovers for another time. We all knew an end time for dinner was in sight and didn't feel like we had to wait as long. W was more often able to have conversations when he was done rather than fidget and be preoccupied with when others would be done. We've mostly loved this plan ever since. But it hasn't been all perfect. Sometimes we forget to set the timer. Sometimes W gets in the habit of pointing out or telling M how much time is left which she doesn't like and we remind him is not his job. Sometimes sports mean is is already a late night when we sit down and we don't feel like having a 40 minute dinner (and maybe M has become a little more focused in her eating too) so we set the timer for less. Overall it helped!

A few final notes:

These strategies-- group meetings and one-on-one problem-solving conferences-- have been invaluable in my professional and personal life. As a classroom teacher I often relied on these problem-solving strategies and found them to be so much more productive, and feel so much more respectful, than other methods of dealing with inevitable classroom behavior problems. Kids are excited to have their problems paid attention to and to be given the chance to give their input. They'd storm in from recess, saying "I have something we NEED to talk about at the next class meeting." I never had a shortage of agenda ideas jotted down when our weekly class meeting day rolled around, which students looked forward to. We all need opportunities to have our grievances heard. 

When I take the time to have a one on one conference-like chat with one of my kids at home, or call a meeting when something has come to a head, everybody seems to leave the conversation feeling more positive. I've seen problem areas improve, if not go away altogether-- sometimes with comically simple solutions, and sometimes after several iterations of trying a solution and failing and trying something else. 

In some cases there are other, bigger underlying factors at play, whether ADHD or extreme introversion or medical issues or anxiety. So of course some problems with kids and families can not be solved by a simple, thoughtful conversation. But many can. And it won't hurt to try. 

These problem-solving strategies are closely tied in with the language we use with kids: our words and tone-- and listening fully-- matter. 

Also, when we choose to tackle a problem matters. In the moment is often not a productive time to try. The right moment is often later, separate from the heat of the moment, when we can sit down and give everyone a chance to say their feelings and work it out together. It's about being proactive rather than reactive. The goal is to walk away on the same page with a plan, so that it might actually go better the next time.

~

Other Resources about Family Meetings (Class Meetings) and One-on-One Problem Solving Conferences:
Article on Teacher-Child Problem-Solving Conferences (equally applicable to parent-child situations)

April 14, 2022

The Joy of Painting Step by Step


We love online step by step painting tutorials as homeschool art projects (I may have mentioned this in 2020 and 2021). 

First of all, everyone's painting of the same subject comes out completely differently. Each artist's style is all over each work of art. Just check out some of the many differences above.

Second, we learn a lot by doing step by step painting projects. While the end goal is to create a particular picture, the kids and I always learn painting techniques along the way that carry over into other projects. To name a few things we've learned: 
  • to make leaves, reflections, snow on the top of a mountain, a background sky that fades from bright blue to lighter blue
  • how to mix paints (or, rather, how to not mix them too much)
  • to paint the canvas or spray it with water first to help the paints blend more smoothly
  • to intentionally use the same brush without cleaning it sometimes
  • how to make some trees and mountains look farther away or closer up
  • all sorts of brush techniques, including holding your white-dipped brush above your painting and tapping it to make it look like it's snowing, and, using a bundle of Q-tips to make flower blossoms  
Each of these techniques we absorb makes us feel a little more adept at the skills of painting, and a little more likely to dream up our own picture and tackle a canvas on our own.

Third, of course, you get beautiful art to hang on the wall. We are always rotating the art work on display in our house, but a pretty canvas is one of the nicer, more polished pieces to decorate with.

Perhaps most importantly, doing a step by step painting project is a great opportunity to practice just trying our best and being patient with ourselves.   

Trying out Bob Ross's Joy of Painting Tutorials

This winter I had a paint and sip night at home with a friend. Since Bob Ross's classic The Joy of Painting show is available to stream on Amazon, we chose one of his paintings to do: "Mountain Lake." I always keep 11 x 14" canvases on hand for art projects, so we used those. Bob Ross uses oil paints. You can buy trademark Bob Ross oil paint sets (and brushes and tools...) online but they are pretty pricey. I don't use oil paints with the kids, and wasn't sure I wanted to use them myself either, so for this project we stuck with a nice set of heavy body acrylic paints we had. While they didn't include all the same colors or color names as Bob Ross's paints, some of them were the same and we could find something close enough for each step of the project. Two tools Bob Ross often uses are a fan brush, and a palette knife. I'd love to get those in the future to try them out, but we just used the variety of brushes in all sizes and shapes that I keep in a jar with our art supplies, and we made do just fine. While the episode was less than a half hour long, we ended up pausing the video a bunch of times to paint and then we'd watch a bit more, pause, paint, and so on. We were at it over two hours altogether but it was such a fun night. 

There's something about taking the time to do something just for the sake of being creative; as an adult I don't do that nearly enough and it's so fulfilling. One downside worth noting: I'd pictured an evening of sipping wine and chatting with my friend while painting, but we didn't do much talking (or wine drinking) because the painting itself took a lot of focus and effort! Our paintings are below; one came out looking like fall, while the other looks more like spring, and one of us oriented it horizontally and the other vertically. We both have a beautiful picture to hang in our houses now; the compliments from my family afterward were very ego-boosting to hear.


In the past, I'd watched a few Joy of Painting episodes with my kids, and they loved seeing the beautiful picture magically appear on the canvas and found it mesmerizing to watch and listen to, as I think many people do. My son went around afterward sharing some awesome Bob Ross quotes, his favorite being his unique encouragement about painting trees, which was something like: "sometimes these son of a guns don't want to come outta your brush, but you just gotta make 'em." You can't help but be charmed by his reverence for "almighty mountains," and of course his happy accidents, free clouds, and happy trees-- not to mention his hairdo. I can see watching Joy of Painting episodes when you just need a little encouragement in your life, whether or not you paint along. His entire message in all his gentle conversation as he paints is about the growth mindset, in an old-timey, grandfatherly kind of way. Bob Ross tells you that mistakes are okay, it doesn't have to be perfect, there's no wrong way to paint a tree/rock/cloud, just relax and try, don't agonize over every detail. It's so wonderful and soothing-- no wonder his show was on for 31 seasons.

Bob Ross's Joy of Painting with Kids

So, after my grown-up painting night, my son (11) was impressed with our results and eager to give a Bob Ross painting a try. Previously my kids have done several different online step by step painting projects, our favorites being from Step by Step Painting with Tracie Kiernan (see end of this post for pictures of one of those, as well as pandas and llamas above). Those projects are definitely simpler than Bob Ross's-- especially since she has a selection of paintings just for kids. But W was ready to try a little more of a challenge, so we went for it. Bob Ross's landscape pictures are all so pretty, it was hard to choose which one. My winter-loving son of course chose a snowy scene. 

We picked an afternoon when we didn't have to be anywhere at a certain time so we wouldn't feel rushed. We set up our area: the computer to play the episode, our canvases, all the brushes we own, a couple of paper towels, a cup of water for rinsing our brushes, a paper plate for each of us for mixing our paints. It went really well for a couple hours. We painted a background, mountains, clouds. It was so neat to see how different our paintings were turning out as we progressed; even though we'd both used the same two colors, the sky in each of our paintings showed two different moods entirely. 


Trying out his own technique for clouds


After a while, W started to get frustrated trying to paint his trees. He didn't like how his trees were turning out, so he painted over them and tried again. He proceeded to do this several times, getting more and more impatient with himself. I tried to remind him of Bob Ross's mantras. The trees don't need to be perfect. Everybody's trees will be different. Just go with it, relax, no pressure, it will all look good in the end as part of the whole painting. It was hard for him to hear any of that right then. He eventually walked away, took a break and a few breaths, and returned to paint a few last steps, and the paintings turned out great: 


I'm really glad my son and I tried out a Bob Ross painting. It was something creative we could do together. It was a chance to really focus on one thing for an extended period of time. It was a good challenge, for both of us. And, except for those few tense moments in the trees, it was a lot of fun. I think it's good to intentionally try new, hard things that stretch us and require persistence.

~

...Because of the time and challenge level, I think it was also a good choice that only my oldest tried the Bob Ross painting. But my daughter (7) didn't want to be left out of the painting fun. A few days later she and I painted beautiful, bright springy scenes of Mt. Fuji and cherry blossoms, from the StepbyStep painting site:  


In summary, any step by step painting project is a super fun, creative activity for all ages. Here's our tips on doing one, whichever source you choose.

Tips for Using Step by Step Painting Tutorials
  1. Bob Ross paintings are best for adults and older kids-- tweens and up.
  2. There are many good, free step by step painting sources online. Tracy Kiernan's site is a favorite for all ages, and better for younger kids.  
  3. Clear a big surface area before starting the project.
  4. Gather your tools: acrylic paints, brushes, water cup, paper towels, canvas, device to watch or read instructions from.
  5. Acrylics work for Bob Ross paintings, even though he uses oil.
  6. Don't worry if you don't have the exact tools or exact colors that the instructor does. Just use whatever you have that's close.
  7. It's your painting; it's okay to choose a different color or to make other choices differently than the instructor.  
  8. Watch, pause, paint, repeat. Don't try to paint and watch at the same time.
  9. Make sure you have a significant chunk of open, free time before you start a painting-- two to three hours. It's no fun if you have to either rush, or have to clean it up and get it back out a second time. 
  10. It's most fun if everyone painting agrees to do the same painting. Once I tried letting each of my kids choose a painting they wanted to do and I supervised and helped both of them pause and start their video on separate devices as needed. It was a little overwhelming for me to keep tabs on what step each of them was on, and they each felt in their own world (plus, I didn't get to paint myself). Much more fun to see your companions' different but similar pictures appearing next to yours and be able to encourage each other along, step by step. 
  11. Try not to get frustrated and just have fun with it.

April 8, 2022

Fan Mail Writing Unit


Who doesn't love getting mail? That was part of the motivation behind a letter-writing mini unit I did with my 11-year-old recently. 

We had just finished a stand-up-comedy unit, and that was fun but quite challenging, so he was ready for something a little more straightforward. He's always talking about his favorite authors and entertainers and what he wishes he could ask them. So I figured it would be a good time to brush up on letter-writing skills and give him a chance to do something he wanted to do anyway. It was a success- both engagement-wise and in the results he's gotten: three letters back from people he admires just this week (less than a month since he sent them out)!  

Here is how the unit went. 

Writing Mini Unit: Letter Writing 
W focused on writing fan mail to some authors and celebrities, but we could have done this letter writing unit on any theme, or even just written to family and friends. 

Length of Time: his daily writing time for about two weeks 

Getting Ready 
I had W brainstorm people he'd like to write to. He used a mind map template I found online, but we could have easily sketched our own. It was a graphic organizer that provided space for him to write names of people, and space to brainstorm a couple of questions or comments to write to each person. I encouraged him to think about why he really wanted to write to each person, and jot down any burning questions or specific appreciations/compliments. 

It was handy he took the time to do this mind mapping to organize his thinking up front; as the unit went on, he referred back to it several times.     


Learning about Types of Letters and Format
Together we first listed some qualities that make a good letter. We covered things like: 
  • include a balance of talking about yourself and asking questions
  • use a friendly tone
  • think about your audience (level of familiarity with them, as well as what they would find funny or interesting)
  • proofread
  • be polite
  • spell out acronyms
  • be clear and coherent
Then we read through this site to help W learn about the difference between a friendly letter (informal) and a formal letter. The site gave some helpful advice about when to use each type and characteristics of each. The most helpful thing was that it showed the format of each with examples. W was planning to write to authors and entertainers he admires, so we decided an informal letter tone worked fine. But we used the format of a formal letter-- Mr./Ms. in the greeting, because he didn't personally know them, and their contact info and ours at the top of the page to increase his chances of getting responses back! 

Write!
He got to work writing and carried on independently every day from that point on. Each time he finished one letter, he would have me read through it just "to make sure it sounds okay." W often would have a great letter, but feel unsure about how to end it. I gave him simple suggestions for how to wrap them up: well wishes like "Have a good spring!" or a call to action like, "I hope to hear back from you soon!", and that sort of thing. He would save the finished letter and begin writing another to the next person on his list till he had finished all six or so letters.  

Finding Addresses and Other Logistics 
Many of W's recipients were authors. We found a site (here) that gave some good tips on finding author addresses in general. First we looked for the author's official web site. There were often specific instructions there on how to write to them, as well as FAQs so he could avoid asking a question that had already been answered. When authors did not have a web site or an address was not given, we wrote to authors in care of their publisher's name and address, which is listed in the front of any of their books. In the end we found a few other ways to reach people: 

One person W wanted to write to was a comedian, so we sent the letter to him in care of his management agency. Fingers crossed. 

Many popular figures have a Facebook page through which you can "message" them, but W wanted to send real letters in hopes of getting a real hard-copy letter back, so we stuck with snail mail options. 

In one case, our letter (in care of a publisher) was returned, so we then emailed the author through the contact form on his web site-- and got an emailed personal response within two days! 

It was a bit of a hunt sometimes but we found a way to contact each person on his list. 

When sending snail mail, it's wise to include a self-addressed, stamped envelope in your letter to increase your chances of getting a letter back. We made sure to stick one of those inside each of W's letters (we even included an SASE with a global stamp on it for an author he wrote to overseas). 


Wait and Hope
We decided it would be fun to finish writing all the letters, then send them all on the same day and see who we heard back from first. A little contest W's idols didn't know they were participating in. 

The speediest response was from Stuart Gibbs, author of the fun Spy School series. W has read all the Spy School books, but especially loved Spy Ski School since he is obsessed with skiing; Mr. Gibbs was kind enough to answer each and every one of W's skiing-specific questions. 


Next we received an email response from awesomely entertaining and semi-local-to-us nonfiction author, Steve Sheinkin. W asked him some writing advice and Sheinkin gave him some. 


Third, and, W says, best so far, was a package all the way from England from Stephen Beisty, author and illustrator of incredibly detailed and informative Cross Section picture books such as Castle and Man-of-War. (He didn't use the SASE we included; he paid 4 pounds in order to send a large envelope and include a photo.) W has been checking his books out of the library for years and keeping them out way too long each time, and he was in awe to see a photo of the artist's actual studio.


W is still waiting and hoping to hear from a few others (i.e., checking the mailbox promptly every day certain that a reply from Lin-Manuel Miranda will be in there). He has been incredibly rewarded by the responses he's gotten so far: Personal letters! Signatures! Photographs! Answers to his questions! Turns out even well known, successful people like to be appreciated. 

Going forward, I might make writing letters to those we admire an annual mini unit for both my kids. We all need more fun mail in our lives.  

February 24, 2022

Our Favorite Homeschool Curriculum (So Far)


We are a secular homeschool family in the midst of our third full year of homeschooling and my kids are at two distinctly different ages (6 and 11). I don't use a single all-in-one curriculum because I don't want to put all my eggs in one basket. I choose what will work best for us in particular areas. Some of the programs and resources we use are things we've liked and stuck with since year one (our math curriculum for example), while in other areas I've made changes along the way, as I've gotten to know my kids, and the options out there, and as we've settled into our own unique homeschool rhythms. We purchase (and find free-- keep reading!) some programs and resources that are good and helpful and give some structure to our days. I also forego purchased curriculum in some areas and leave room to be creative and design our own units. One of the best things about homeschool is that if a program or approach isn't working well, you can always make a change-- even mid-year. 

Below are the programs and approaches we are using in our homeschool this year across academic areas. (If you're curious: my 2019 - 20/first year homeschooling curricula and thoughts are here, and 2020 - 21/year two curricula here.) 

Note: I currently have a 6-year-old/first grader and an 11-year-old/sixth grader. I use the resources listed below for both of them (at their respective levels), except where separate programs are noted.


Our Homeschool Curriculum 2021 - 22

Reading: No Purchased Curriculum or Planned Lessons or Assignments
I do not use a reading program in our homeschool (though I did our first year). Besides the fact that the one I love from my classroom days is really expensive, the fact is that my own two kids already live readerly lives and aren't at a point where they need daily, explicit lessons (here is a post about some tips and sources I used last year to help my daughter learn to read in the first place). They read a variety of things from graphic novels to online news, historical fiction to their latest favorite fiction series. They both pick up a book whenever they get a chance and disappear into it for long periods of time. They talk about what they read and they ask what new vocabulary means. They don't need reminders to read. Because of all this, I've learned I don't need to schedule or assign reading time officially. We read aloud to them both daily, and keep the house well stocked with fresh library books, and they take care of the rest.     


Writing: No Purchased Curriculum
We work on a certain genre of writing at a time in a unit of 6 or 8 weeks. For my youngest, I usually choose what that genre will be; for my oldest he has a lot of say and jointly plans out with me the types of writing he is interested in working on. Within the genre they're focusing on, they always choose their own topic. For example, my son is itching to write historical fiction next. I won't dictate the time period he needs to write about or the type of story it needs to be. But I will do some research so that I can inspire him with good models of historical fiction, and share some tips for doing that type of writing well. I love putting together a unit of study on a particular type of writing, and I don't need to have had experience with the type of writing myself to find good resources and give them a good learning experience. Last year my son had a blast with a unit on writing rap, and almost every year we write some poetry at some point. Every day they can always add to an existing piece or start a new one. For my youngest she is always welcome to draw first and write later or whichever order she prefers (here are some other tips for getting the youngest kids to write in the first place). After working on a genre for a while, they choose a "best" piece they're proudest of and revise it to make it even better. We always find a way to celebrate and share their writing, especially at the end of a unit.    


Math: Primary Mathematics
Primary Mathematics is part of Singapore Math. It is from Singapore (where students perform quite well in math) but there is a U.S. version that we use. It is challenging. It is mastery-based; you work with a concept until they really understand, or have mastered, it. (This is different from a spiraling math program, in which concepts are touched on briefly, repeatedly, and rotated throughout the year. I have used spiraling programs in the classroom and don't find them as effective.) There are a lot of reviews built in-- reviews after the end of a section, and also periodic cumulative reviews. Primary Mathematics encourages the parent/teacher to allow the student to get the answer using a variety of methods as long as they understand the concept. Primary Mathematics is inexpensive. There is a paperback teacher's guide, a textbook, and a workbook for each half of the school year (for example, "6A" for the first half of 6th grade and a "6B" for the second half). There are no colorful illustrations or bells and whistles as it seems many math programs have; instead, lessons and tasks get right to the point. There are only a few simple materials needed for the program (so few that our first year of homeschooling, because of a funny schedule on Wednesdays, my son and I were able to easily have math class in the car once a week). There are plenty of instructions included for simple math games we play, especially at the primary level, but essentially each day is a brief lesson, and then a couple of practice pages for kids to do on their own. My kids are performing well in math and this program is easy for me to work with as the teacher. This is our third year using it.

 
Science for my 6-year-old: Mystery Science (K-5)
We love Mystery Science. Check out this entire post about why we love it for details. Briefly: it is fun, it is aligned with national science standards, it is very affordable (around $70 for an entire homeschool family for the year), it requires minimal materials, it is online/video-based yet also hands-on. It is super engaging, age-appropriate, and teaches concepts in clever, simple ways that really stick. Science is my daughter's favorite subject. 

Here she is having so much fun figuring out how to make shadows longer or shorter or pointing in different directions as part of a unit on patterns in the sky. (Please excuse the fact that the pictures are taken in our bathroom, as we needed a dark room for the activity!) 


Science for my 11-year-old: Discovery Education Science Techbook (K-8)
Because we love Mystery Science (above) we were sad that my oldest outgrew it this year; it only goes through 5th grade so we had to find another source for 6th-grade lessons for him. We purchased a one-year subscription to Discovery Education Science Techbook through our free membership with the Homeschool Buyers Co-op for around $60. Science Techbook works in an online format. It was one of the few science options I found that was standards-based. There is a lot of technical vocabulary, tougher concepts, and higher-level skills expected as part of the activities-- all good things but it has been an adjustment from the accessible and super engaging Mystery Science he was used to (see above). Some units are quite long and I know we won't get "through" it all by the end of the year...but that happens sometimes in school as well as homeschool. Every time we finish a concept, I spend way too long trying to remember where to find the assessments, but we are learning our way around the interface and how it is organized. (One other note: since Science Techbook is for K - 8, I dabbled in some of the primary units with my youngest as well just to supplement her science, and I felt it was too much computer, paper-and-pencil, and video time, and it didn't feel age-appropriate and fun for younger kids. So I'd recommend it only for older kids.)

Looking at an Elodea leaf under a microscope as part of a unit on cells

The Core Knowledge Foundation is a non-profit that publishes educational books, materials, and entire units in many school subjects. We pick and choose from the social studies units exclusively (not other subject areas) and especially for my oldest. I scroll down the Core Knowledge web site where you can download curriculum for free, check the box that says "History & Geography," then check the grade level I am interested in and look at the units available. We don't do every unit listed, because there are a lot. This year W chose which topics he was most interested in, including some that happened to be listed under other grade levels. The units are each essentially a textbook, or mini textbook. There is a student reader and a teacher's guide. My son reads a couple of chapters at a time and then we discuss them, using the questions (and provided answers) in the teacher's guide as a basis. There are a few worksheets scattered across each unit that kids can do, but nothing that takes too much time. It's pretty straightforward, standard educational stuff. But each unit includes online resources, sites you can visit to visualize and extend the content from each chapter. There are virtual tours, links to primary sources, museum web sites, and YouTube videos. We find the online resources and activities that go with them really engaging and I find that part is what really makes things stick. We've found the Core Knowledge units to provide a strong, solid understanding of times in history and events that we've studied. 

W made his own illuminated choir book pages as part of a unit on medieval Europe
 
Those I've listed above (reading, writing, math, science, social studies) are the core subject areas that we do most days. Below are a few other areas of study that we do less frequently. 

Phonics for my 6-year-old: Mix of a Couple of Programs
My daughter is a strong reader and a good speller so she's internalized a lot of things that I would have taught consistently and daily in the classroom. So I just do a little focused practice with her about once a week to work with words and focus on some conventions (handwriting, punctuation, spacing). There are two books I bounce between when we do spelling/phonics work. One is Month-by-Month Phonics for First Grade, which has lots of fun activities to work with words and word patterns. The other is Words Their Way. (I wrote a post in more detail about how Words their Way works here.) It's a spelling approach that allows you to find your student's level using this guide. Once you find their level you know which book to purchase full of spelling lists of the types of words they need to work with. We copy a list of words, cut them out and she can sort them in various ways and notice characteristics of the different words and do activities with them.   


Grammar for my 11-year-old: Easy Grammar
This was recommended to me by a homeschool friend when I realized my then-fourth grader didn't know the parts of speech, and it has worked just fine for us. I only purchase one book, the Teacher Edition, because it includes the lesson information (which is very brief) and answer keys as well as the student pages; I copy them for my son to do. We don't do grammar daily, because he's a strong reader and writer and because there aren't many times someone is going to tell him to diagram a sentence in life or ask him to name the object of the preposition. But I think the basics are good to know and the exercises are quick and to the point. So once a week or so, I introduce a new concept and give him a few practice pages to do. It has worked well for us and cost very little time or money. 


Foreign Language: Duolingo and Dinolingo
Last year we tried Rosetta Stone when my son was just starting out with a foreign language (Greek was his choice). Partway through the year he switched to Duolingo and has stuck with it and likes it. It is online, and free! It is intended for ages 13 and up but my 11-year-old has done fine with it. Like all of these online language programs it seems, it doesn't actually teach most new vocabulary explicitly, but adds it into exercises where you have to guess at first, and then repeats it often until you catch on and get it right. 

My daughter had some fun with sign language last year but wanted to work on the same language as her brother so she does Greek now as well. I found Dinolingo as an age-appropriate, inexpensive option for younger kids. It is more visual, consistently using pictures or videos, and it is highly game-based so she loves it. I think she secretly likes doing Greek simply because it feels a little like she is getting away with playing a video game, but she does go around the house counting in Greek so I know some things are sinking in! 

~

So that is what we use for curriculum in each of the different areas in our homeschool. I hope this is helpful for any homeschoolers just starting out, or looking to change. I hope to share how we put it all together in our regular daily routine soon!